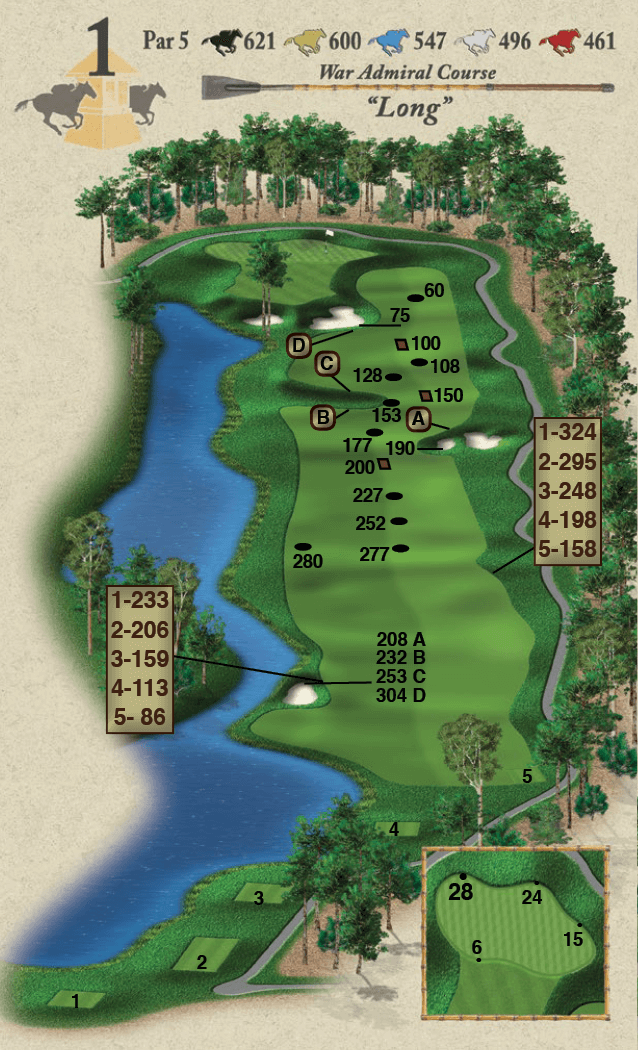
Hole 1 – “Long”
There is more room off the tee to the right side of the fairway. Favor the right side again on your second shot but beware of the bunker. The green is wide and receptive but avoid being long which will make for a tough up and down.
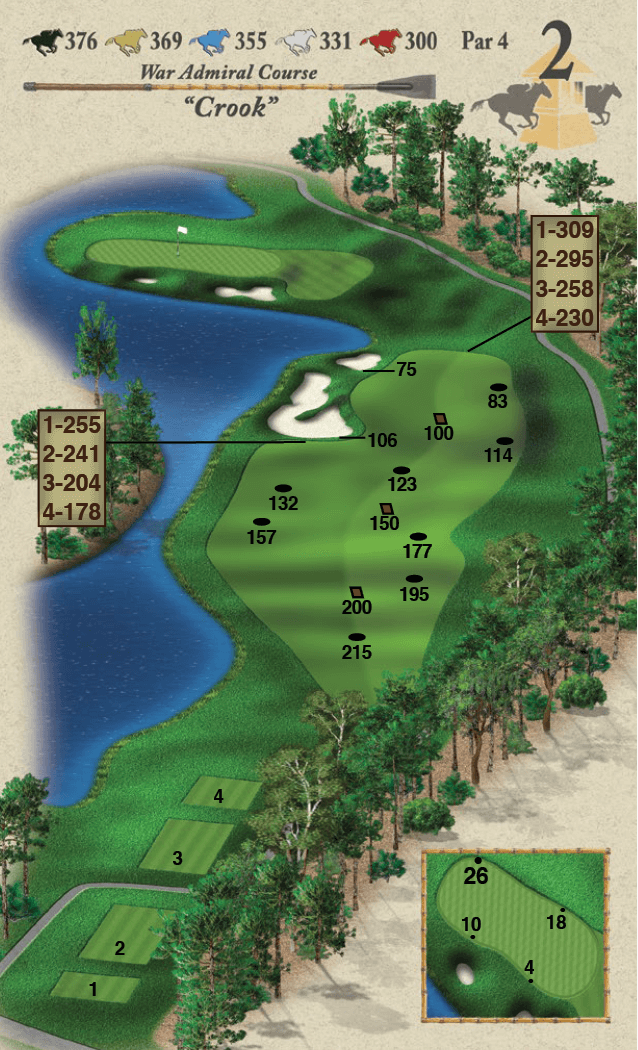
Hole 2 – “Crook”
The right half of the fairway is an ideal target from the tee. The green is very shallow and accepts a higher shot more favorably. The bail out area is to the right of the green but water lurks long.
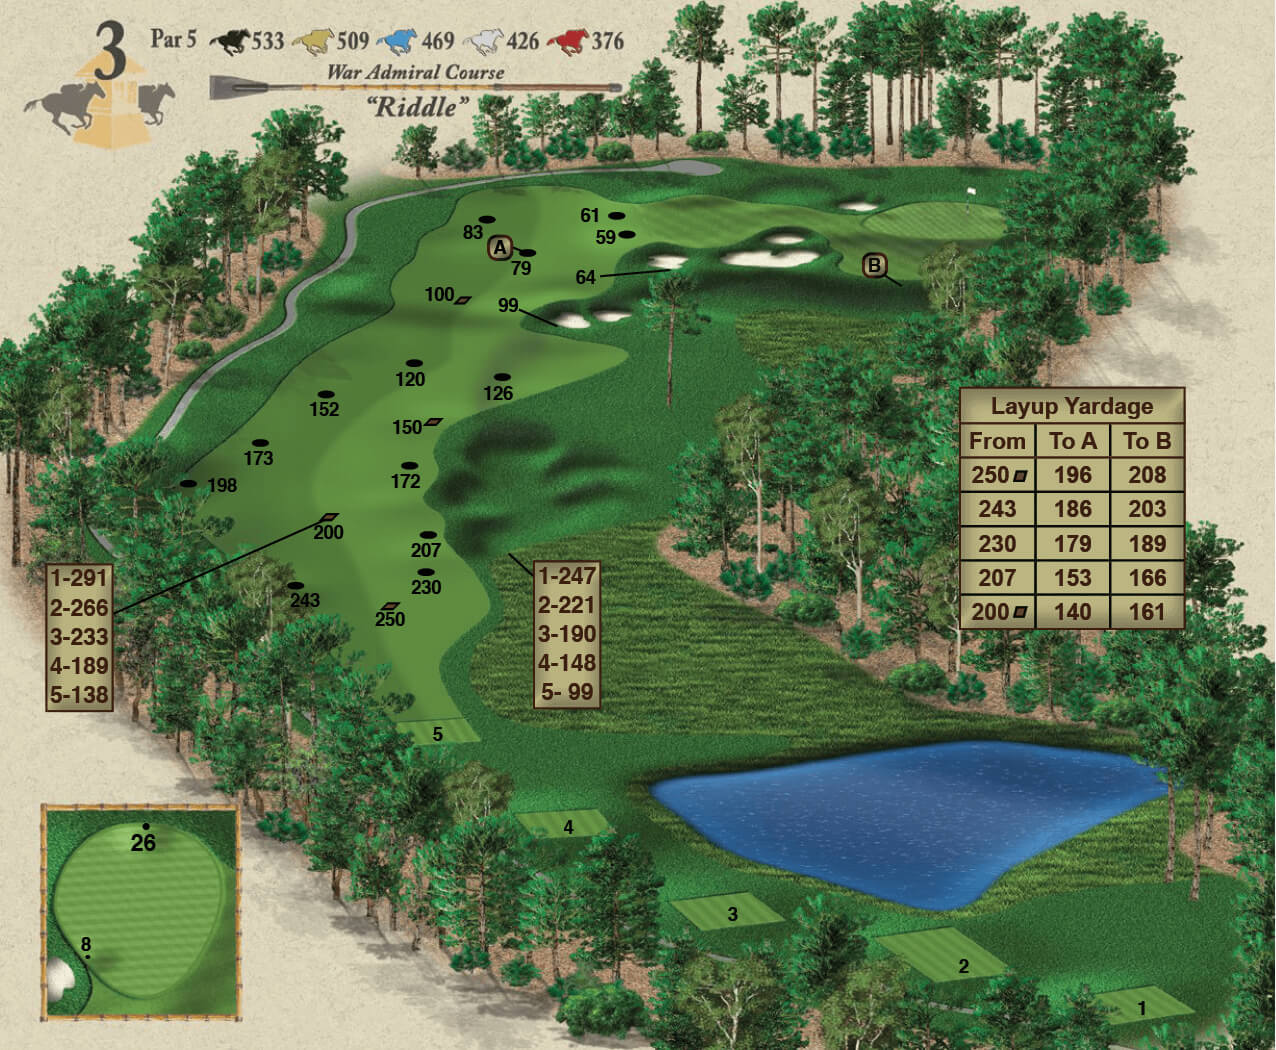
Hole 3 – “Riddle”
Aim down the left center off the tee and you will be in a perfect position to go for it in two. The bunkers in view are not greenside as they would appear and there is a bail out area to the left. A small green awaits you with a relatively easy green complex.
Hole 4 – “Carry”
The green is plenty wide but not very deep. Do not be long! There are many inviting pin spots to aim at but beware of this difficult sloping green. Distance control is everything here but a pin high shot will leave you a chance at birdie.

Hole 5 – “Plateau”
Favor the left side off the tee eliminating the bunkers that cross the fairway. The green slopes from left to right and away from the front with a small run up area before the green. Be careful of the huge grass bunker left of the green and aim at the middle to right portion with easier up and downs from this side.

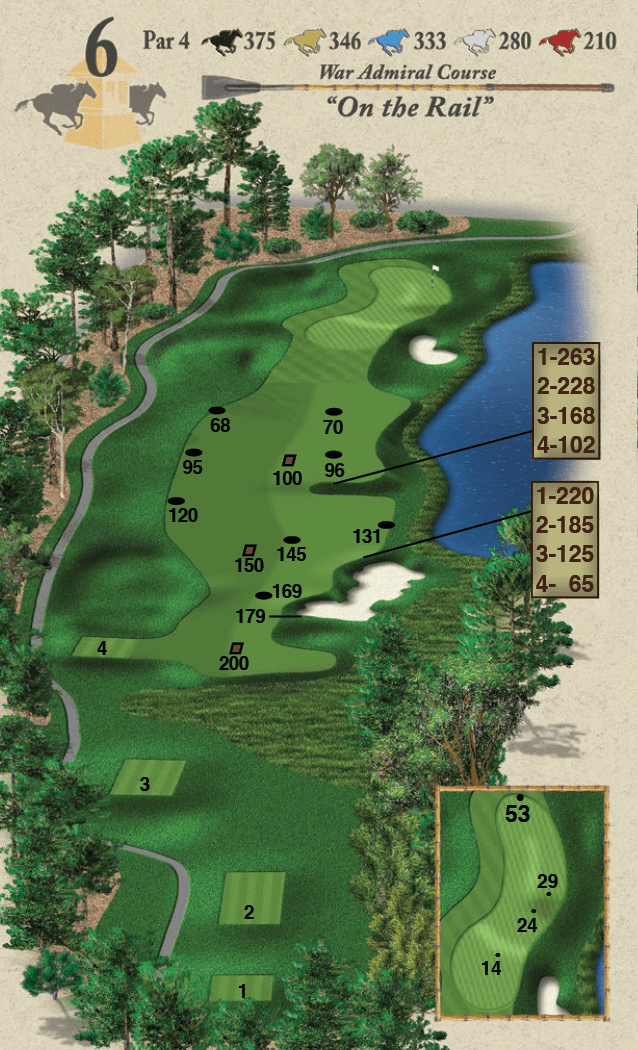
Hole 6 – “On the Rails”
Water guards the entire right side of the fairway and is reachable off the tee. Left center leaves a perfect approach angle. The green is massive with a depression and a huge mound from the middle to the back. Distance control is imperative to getting the ball close. Should have a birdie putt with two decent shots.
Hole 7 – “Precision”
A beautiful par three with a small bail out area to the left. This receptive green will reward a good shot with a makeable birdie putt. Do not be long or you will bring a bogie or double into the equation.

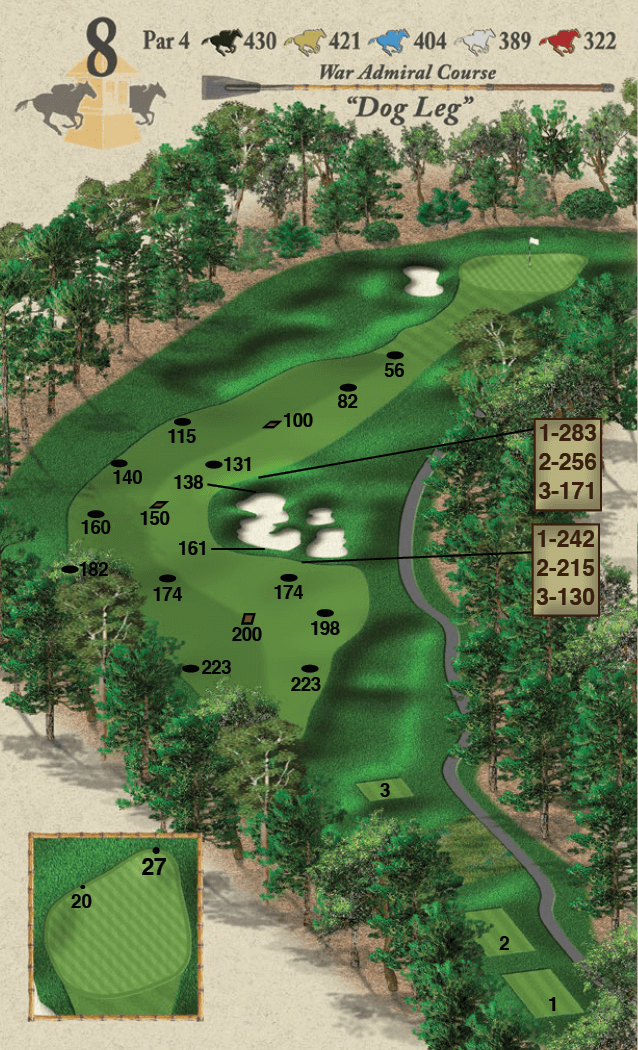
Hole 8 – “Dog Leg”
Don’t try to carry the bunkers and instead aim down the left side to avoid trouble. The green is guarded by a deep bunker on the left and is more uphill than you realize. Take an extra club if necessary and play to the middle of the green for your best chance at making birdie.
Hole 9 – “Precision”
This par four is all you want. This hole favors a fade off the tee leaving a lengthy carry over marsh to the green. Once you have found the fairway, take an extra club to make sure you get over and you will find a tricky green but with easier ups and downs than it appears. If you don’t make it over on your second shot, there is a drop area by the greenside.

Hole 10 – “Tranquility”
This par three always plays longer than the yardage. Once you carry the marsh, you will see a large green with 3 tiers. Hitting the appropriate tier will give you the best chance at a birdie. There is a drop area to the left of the white tees if you don’t make it.

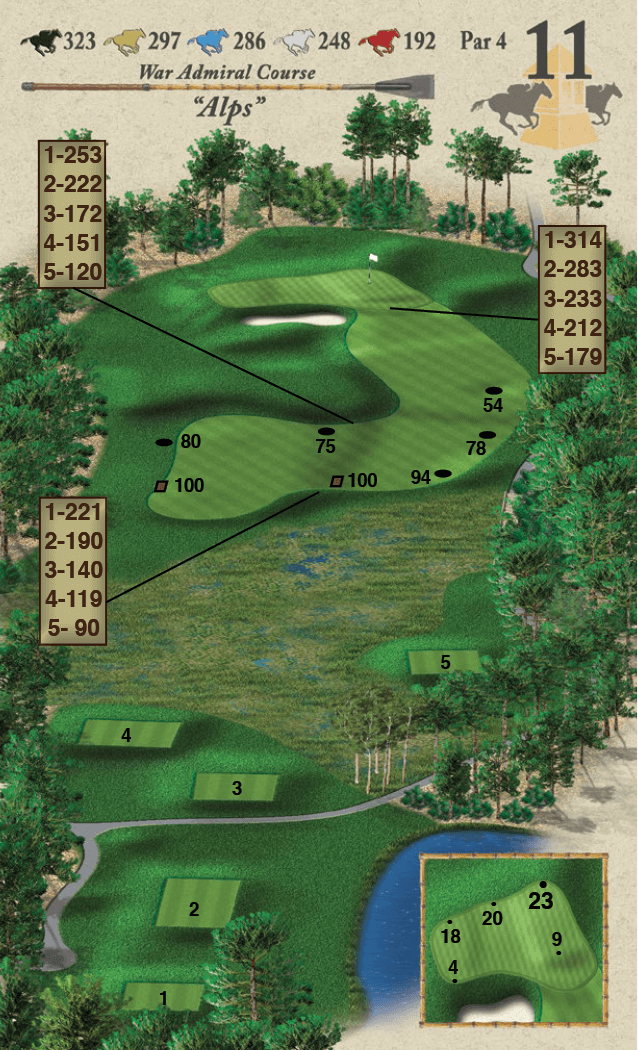
Hole 11 – “Alps”
Aim for the right side of the fairway and you will have the best angle for the approach. Driver is not necessary off the tee. The green is quite shallow and going long can be fatal. Watch out for the left side sucker pin placement and aim for the middle.
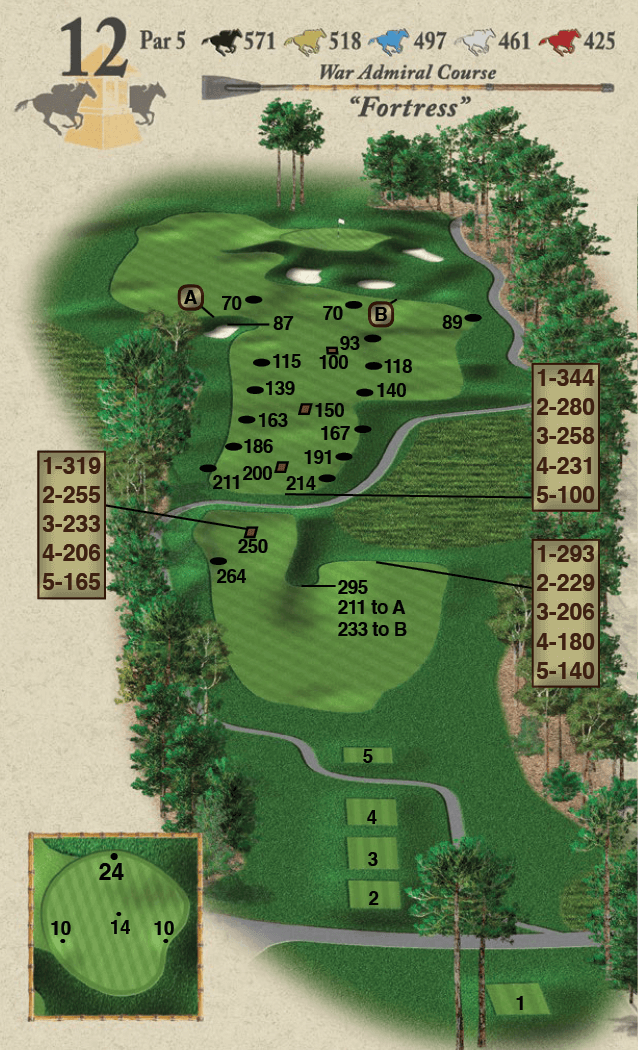
Hole 12 – “Fortress”
Leave driver in the bag and use a long iron or utility wood to avoid going in the hazard. Aim for the right side of the fairway for the best angle. Make sure you leave yourself a full third shot into this green so that you can get some spin on the the ball. This well bunkered, raised green is difficult to hold.
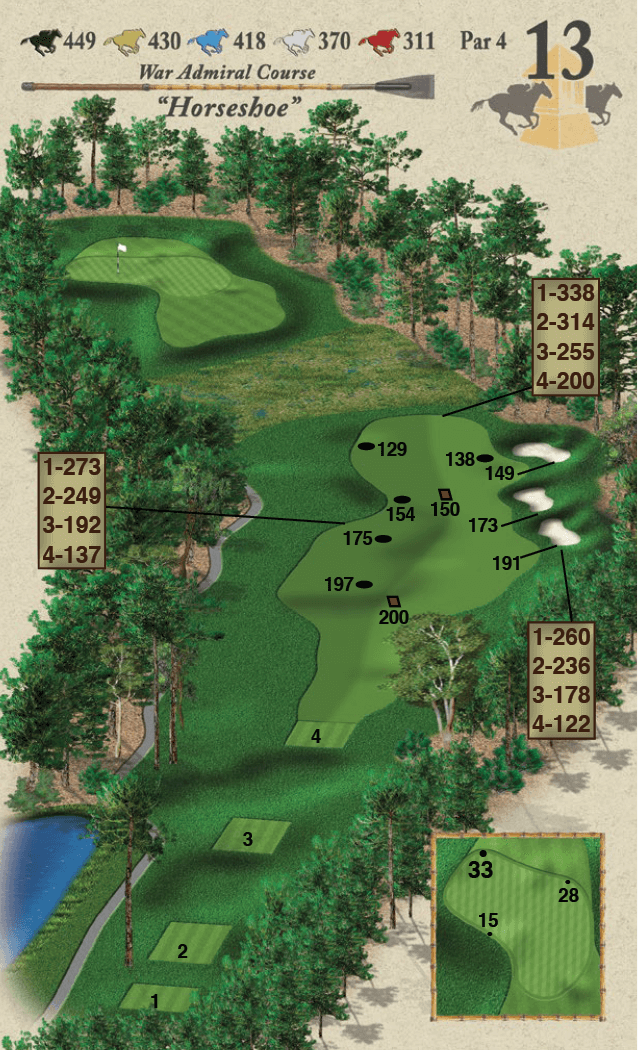
Hole 13 – “Horseshoe”
Plenty of room off the tee but the bunkers can come into play on the right if you are not careful. the second shot is uphill and plays longer than the yardage. This green is difficult to read but there are lots of areas to get up and down from. Short of the pin is preferable to long on this hole.
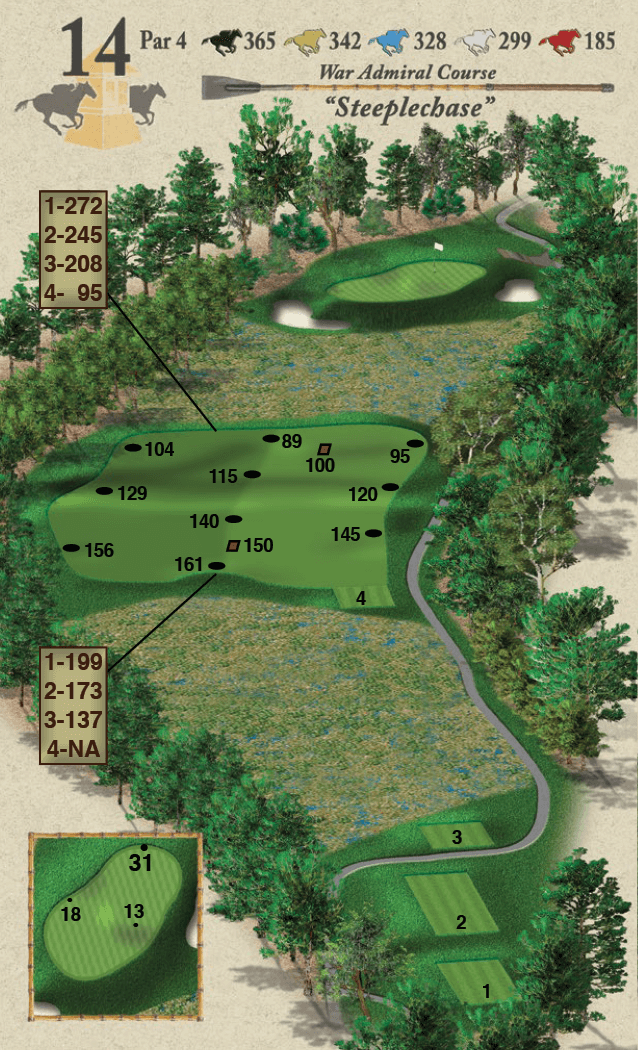
Hole 14 – “Steeplechase”
Lay up short of the second marsh by hitting a long iron or fairway wood. Make sure you leave yourself another full shot into this drastically elevated green and whatever you do, don’t go long. Pick the shorter of the two irons for your approach and you will be entering a score of birdie!
Hole 15 – “Punchbowl”
The right side of the fairway eliminates the bunker that juts out and can be reached. The second shot is straight forward, but beware of going long. This green is firmer than most and will usually release back to the hole. The left greenside bunker should be avoided at all costs.

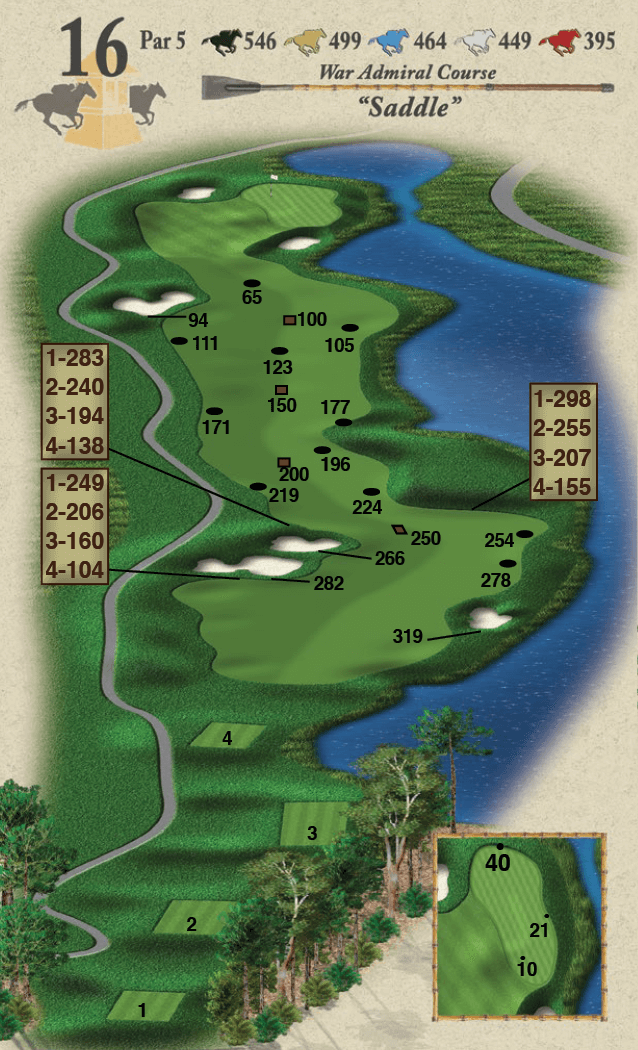
Hole 16 – “Saddle”
If you are feeling strong, you can try to fly the bunkers that cross the fairway but out of bounds guards the left. The prudent play is out to the right. With water guarding the right side, be sure to play to the left center for the best angle of approach. This green will release as well and is very deep. Pick the shorter of the two irons to have the best chance of making the putt.
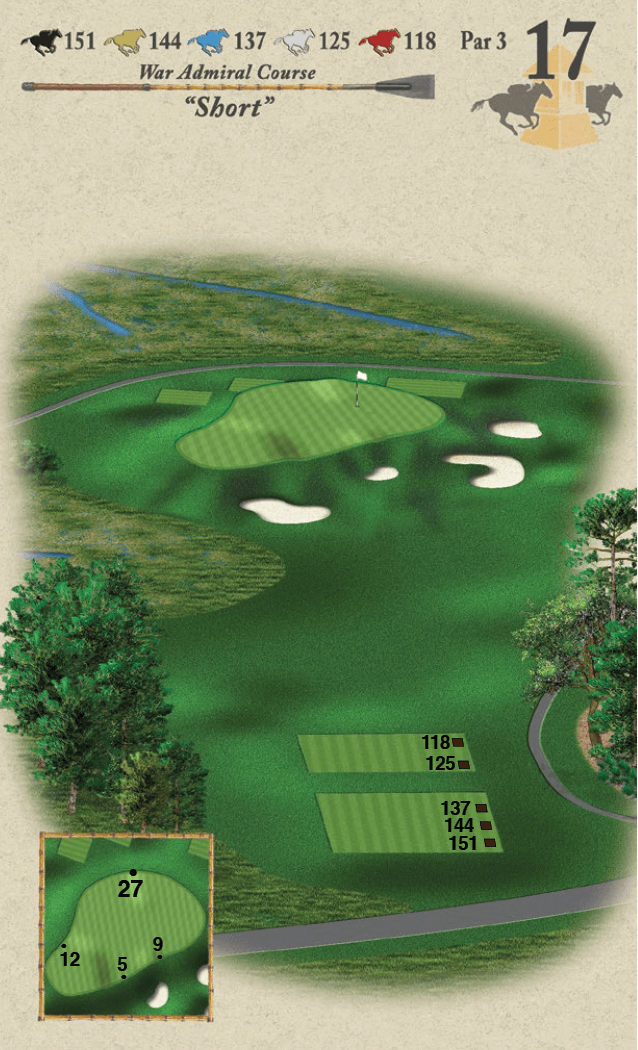
Hole 17 – “Short”
Even though this par three is short, it has a big bite. Club selection is key to this well protected green with lots of trouble long. Make a good swing and trust your iron selection. The green is receptive and will give up some birdies once you are on the playing surface.
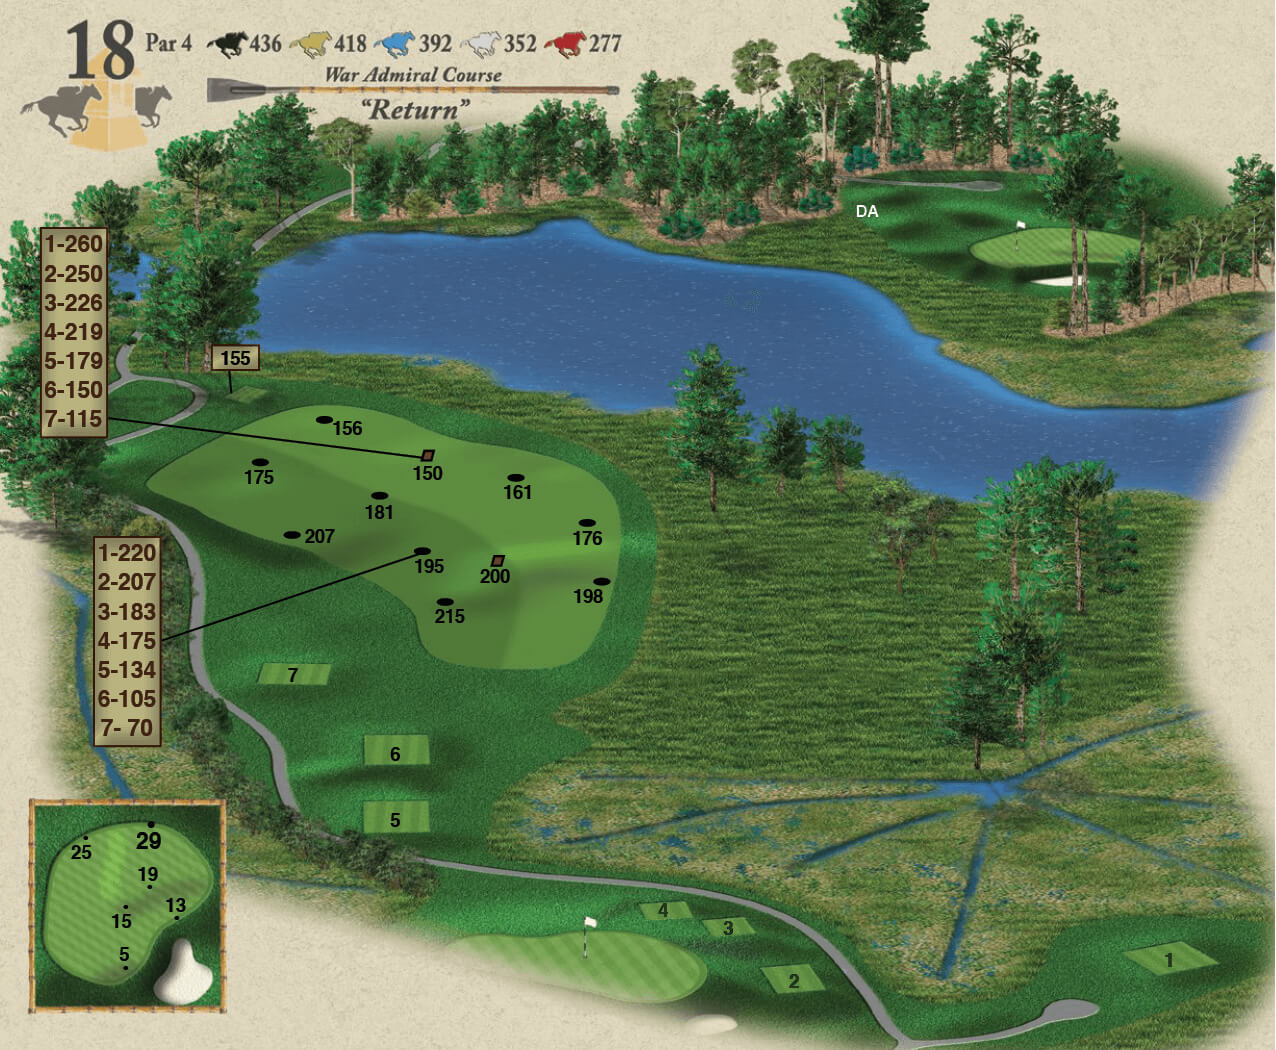
Hole 18 – “Return”
Position off the key is paramount. The right center of the fairway will give you the shortest approach to the green but check your yardage to the marsh. This green complex is well guarded will bunkers and marsh and it sloped from back to front. The green holds long irons well and is known to give up a birdie or two. A drop area greenside awaits those who don’t make it but two good shots and you could be winning all the cash!