
Hole 1 – “Bell”
Careful of the two bunkers off the tee. A shorter drive is probably recommended. Then a second shot to a false front green which is rather receptive. Be careful not to go left of the green which makes for a difficult up an down.

Hole 2 – “Pace Setter”
This little par 3 can really pick your swing apart if you are not careful. Long is better than short here with an hour glass shaped green which will rarely give up many birdies.

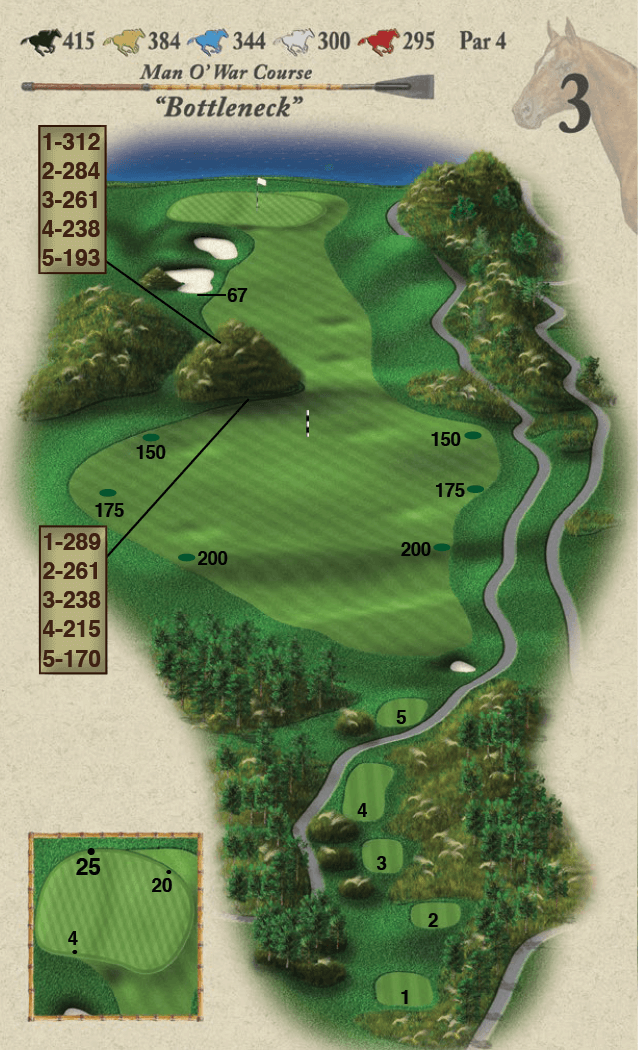
Hole 3 – “Bottleneck”
Pay attention to your drive and make sure you place it in the right half of the fairway. This will allow you to see the green and avoid “Devils Knob” on the left half of the hole. Take a half club less on your second shot here to ensure that you don’t go long.
Hole 4 – “Temptation”
This par 5 will grab your attention of the tee with water all down the left side. Stick to the right side all the way down this hole and you may find yourself with a relatively easy birdie putt on a bowl shaped green.

Hole 5 – “Straight Away”
Steady as she goes off the tee here with bunkers left and right. An elevated green won’t make thing’s any easier for your second shot but play it to the left side of the green. Everything slopes left to right on this modest putting surface.

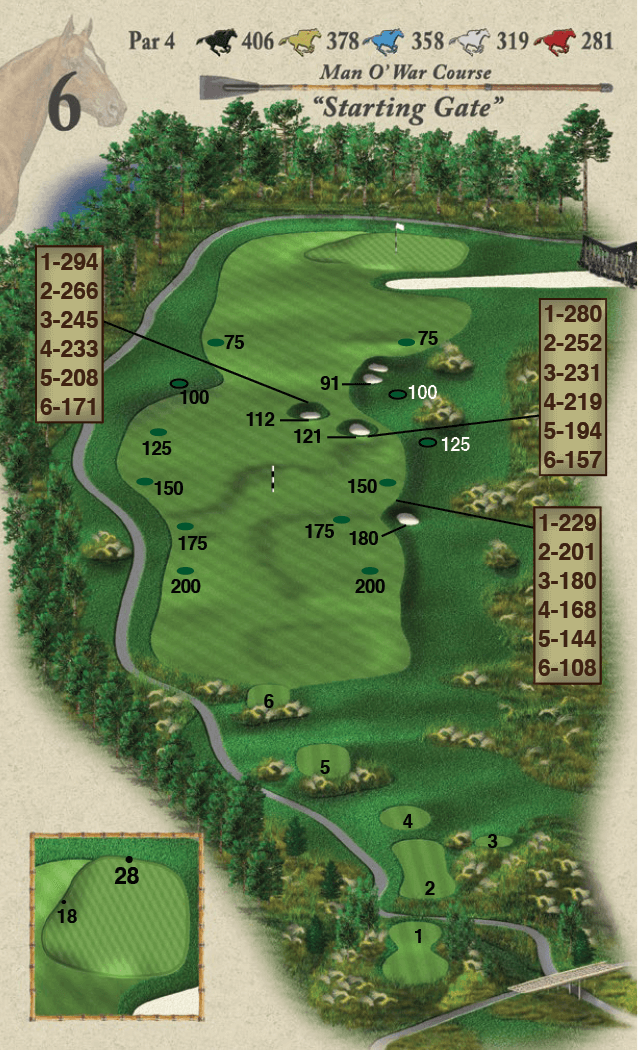
Hole 6 – “Starting Gate”
Play your tee ball favoring the right side of the fairway to avoid the hazard on the left. Your second shot will be played over the race track to a large green which has some subtle breaks to it. Don’t go long or your chip could be very dangerous.
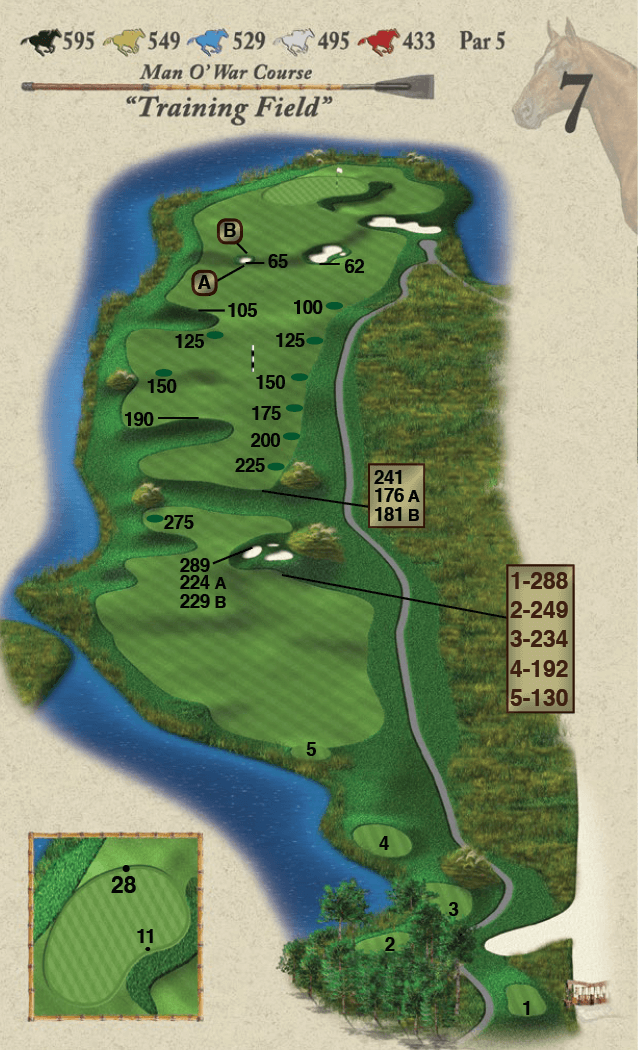
Hole 7 – “Training Field”
Definitely a 3 shot par 5 here but watch out for the unseen water all down the left side of this hole which could cause some problems. The water also wraps around the back of the green so be selective with your club on your approach shot.
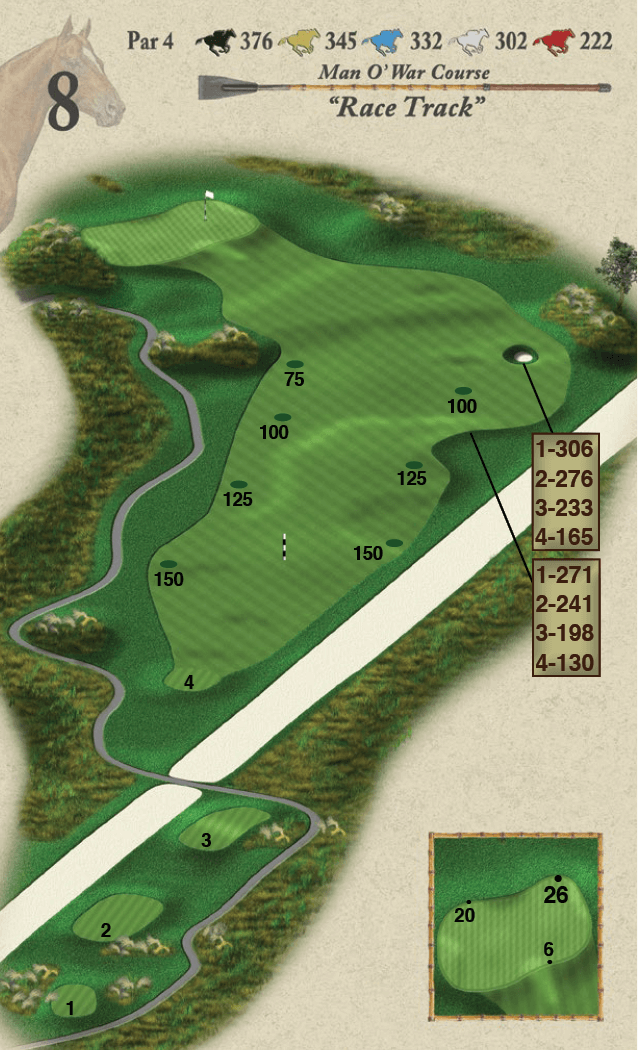
Hole 8 – “Race Track”
This par 4 is a short one and best played down the right half of the fairway. The second shot is relatively straight froward but don’t be long or you will have a slippery chip coming back down the hill.
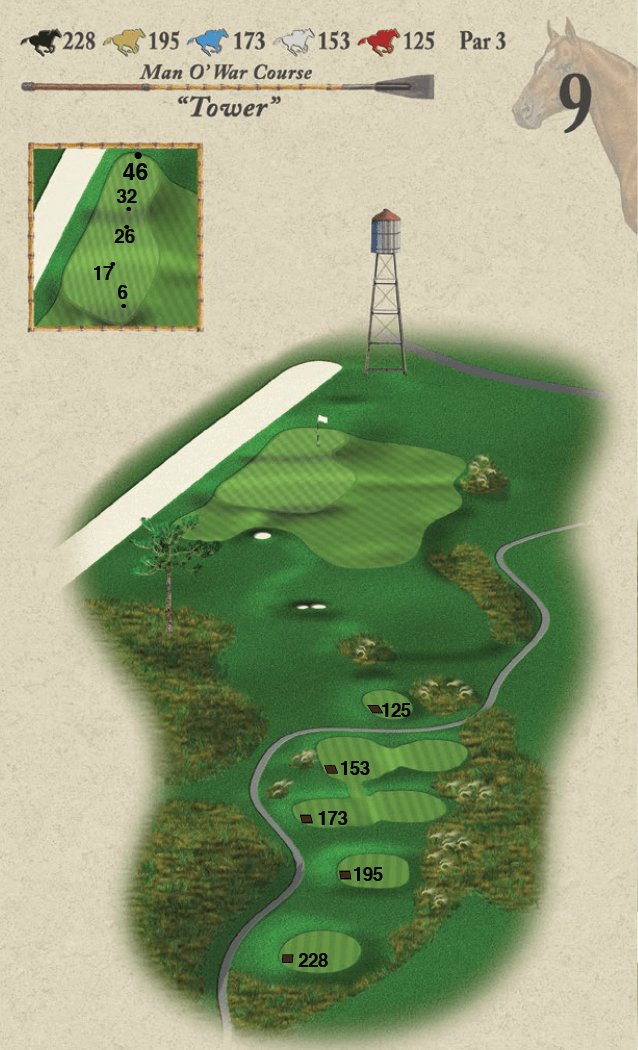
Hole 9 – “Tower”
This is a solid par 3 with the race track on one side and a beautiful view of the water tower. Best to bail out right here and the three tiered green will make for a difficult two putt from anywhere.
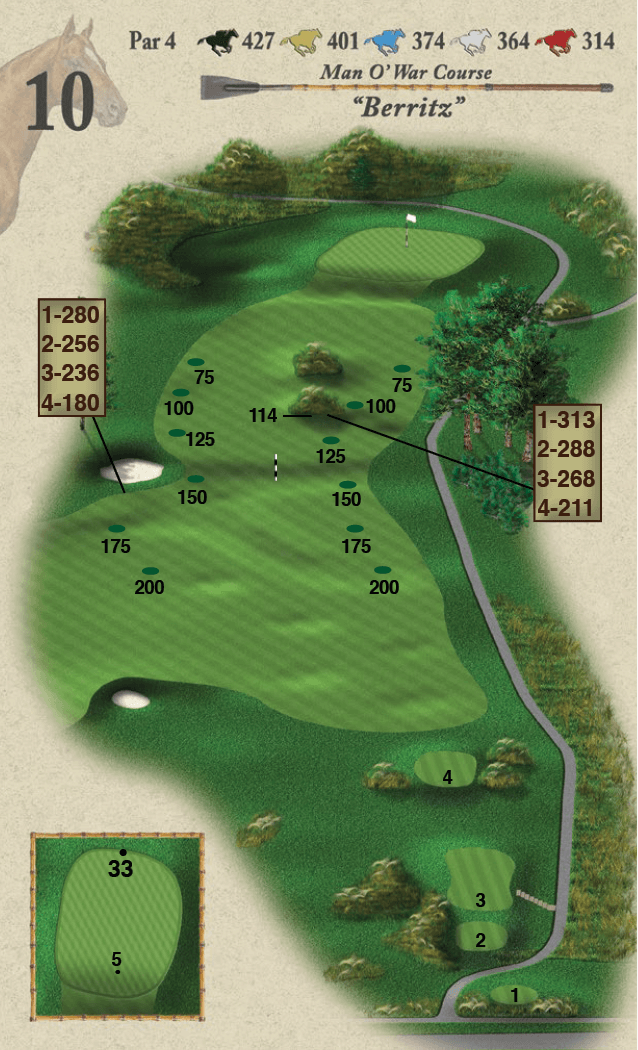
Hole 10 – “Berritz”
This par four always plays longer than the yardage . Once you hit your drive safely be wary of the false front green which would leave a very difficult up and down. This green complex is relatively straight forward and you will see some pars and birdies made here.
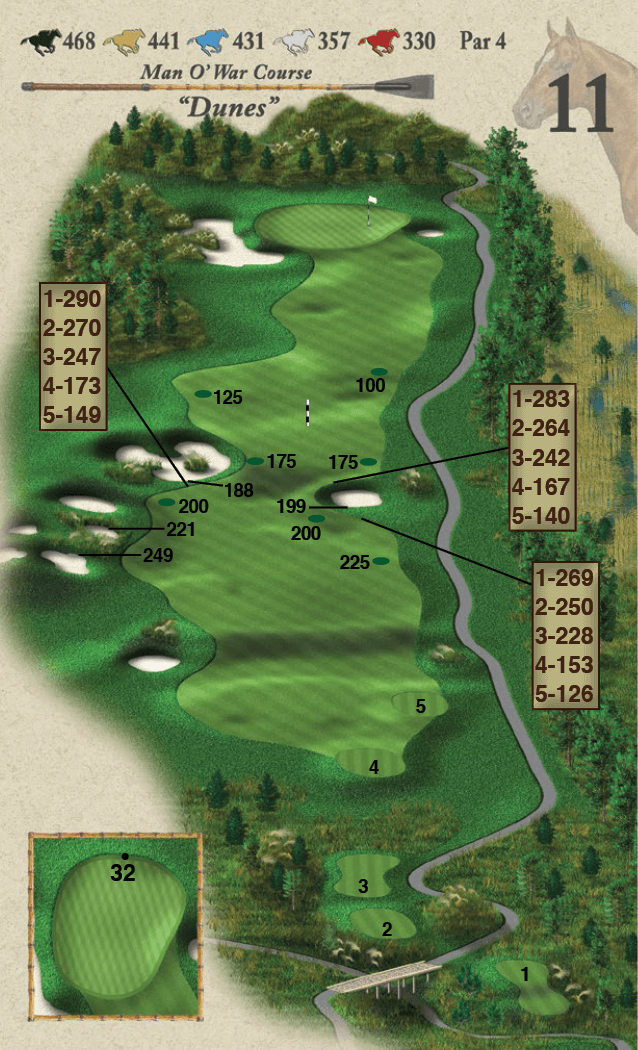
Hole 11 – “Dunes”
This par four is all you want. It can be extremely long and usually plays into the prevailing summer breezes. A tough tee shot with a long second on the green will reward any player with a well deserved four which could easily be the winning score in any foursome.
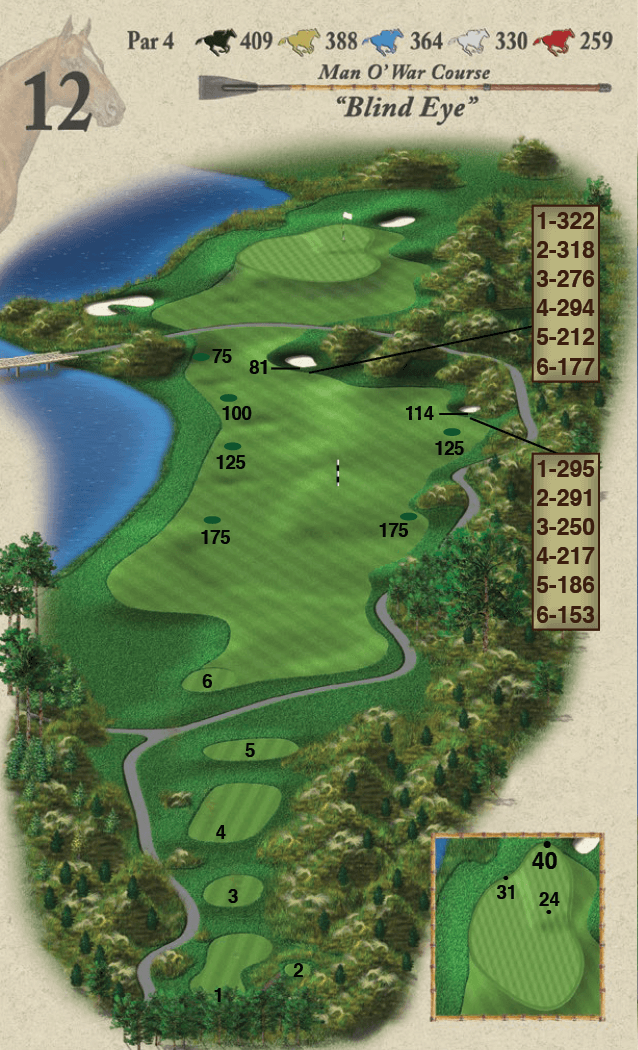
Hole 12 – “Blind Eye”
Leave driver in the bag and use a long iron or utility wood to avoid going in the hazard on the left. Aim for the right side of the fairway for the best angle. Make sure you aim for the right side of the green with your second shot and you will be putting for birdie with no problem at all.
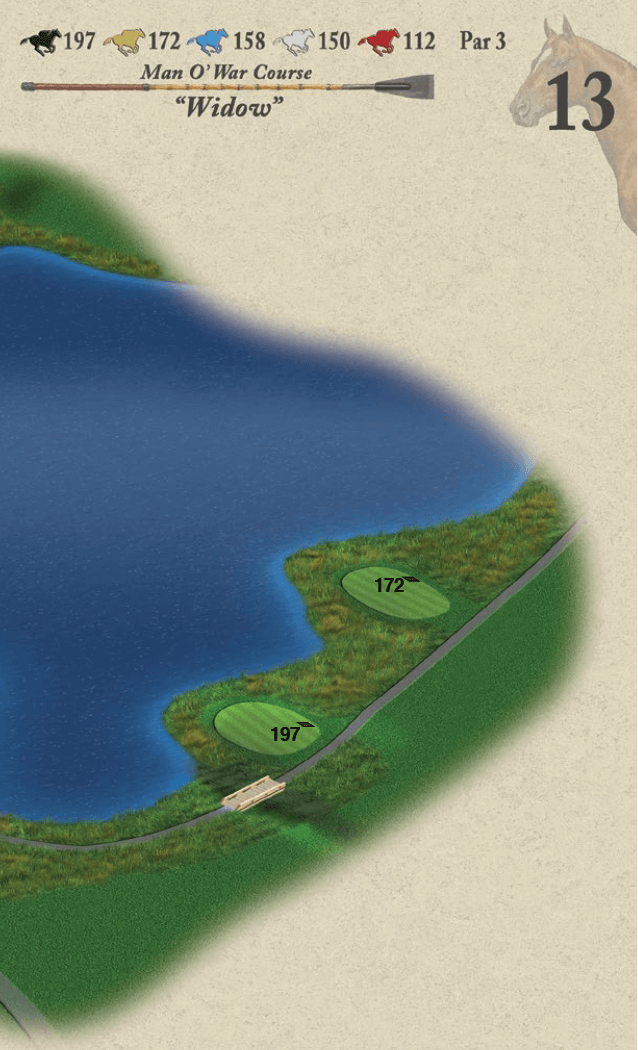
Hole 13 – “Widow”
This par three over water is one of our signature holes here and usually plays into the wind. The only place to bail out is the left side and you will find that the green slopes rather severely from left to right. Both hands on the wheel here!!
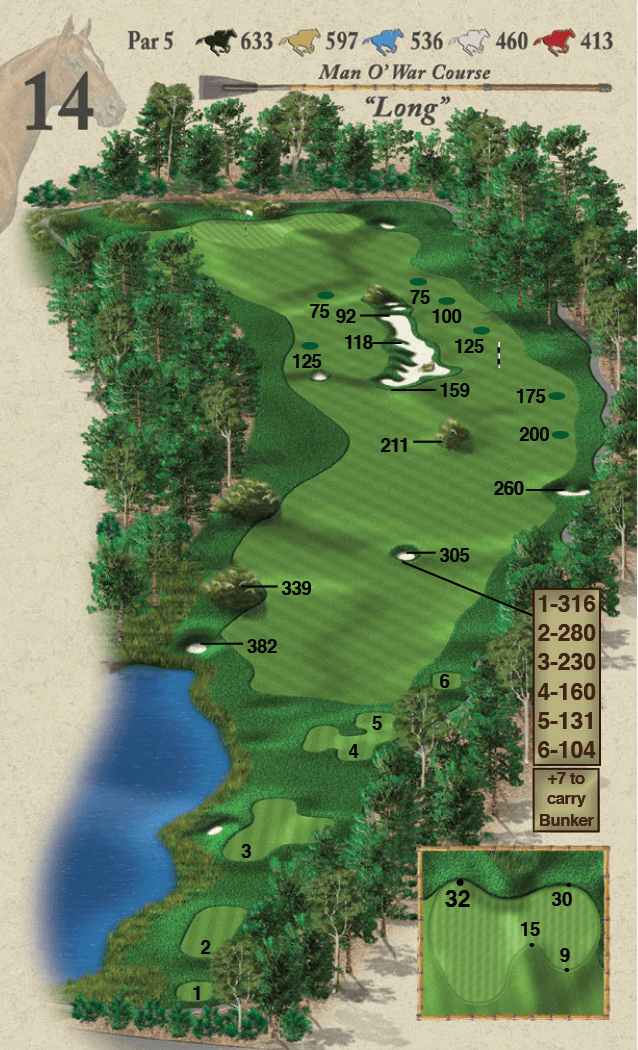
Hole 14 – “Long”
Probably the longest par five here at GlenRiddle. The drive and second shots are best played down the right hand side to open up the view of the green. The green is two tiered with the left being the lower of the two and definitely playing shorter. Pay attention to the yardages if the pin is cut right.
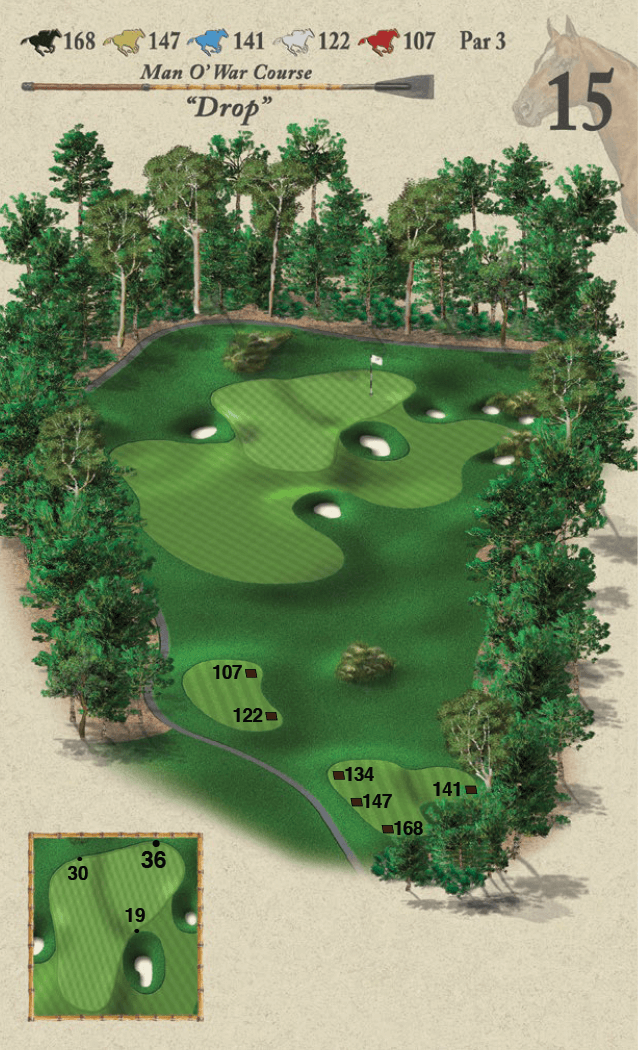
Hole 15 – “Drop”
This little par three can bite you if you’re not careful. The front and middle pins are straight forward but the back is very dangerous as the green slopes away from you. A gentle fade for a righty usually works best for the shape of shot.
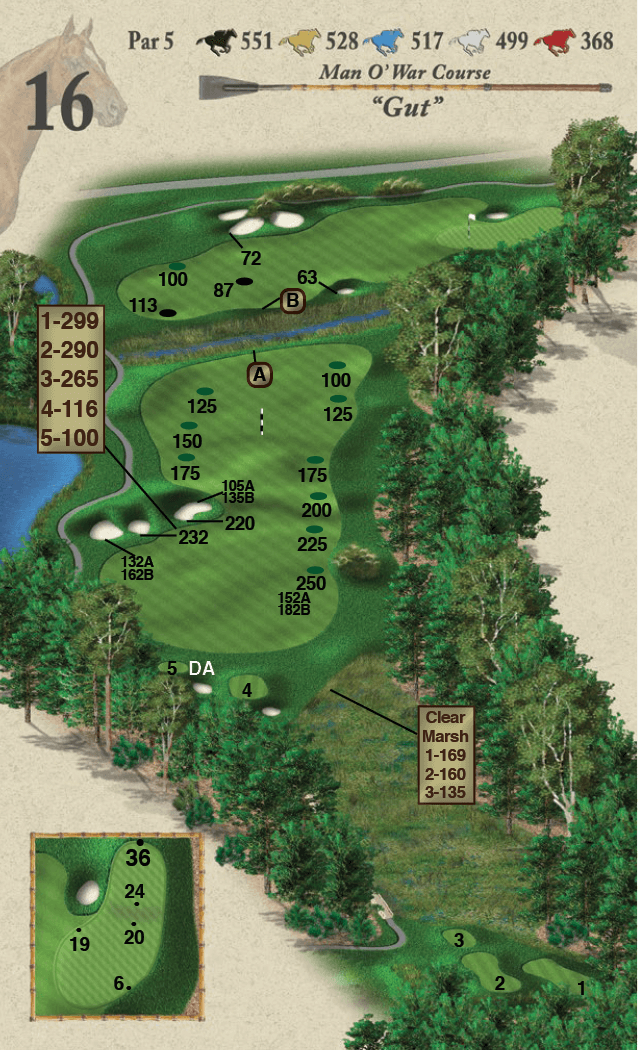
Hole 16 – “Gut”
If you are feeling strong you can try to fly the hazard that crosses the fairway on your second shot. Most of all the trouble is to the right so pay attention to the yardages and pick carefully. This par 5 reachable in two but the green sits farther right than you think. Miss the green left and you will face a tough up and down.
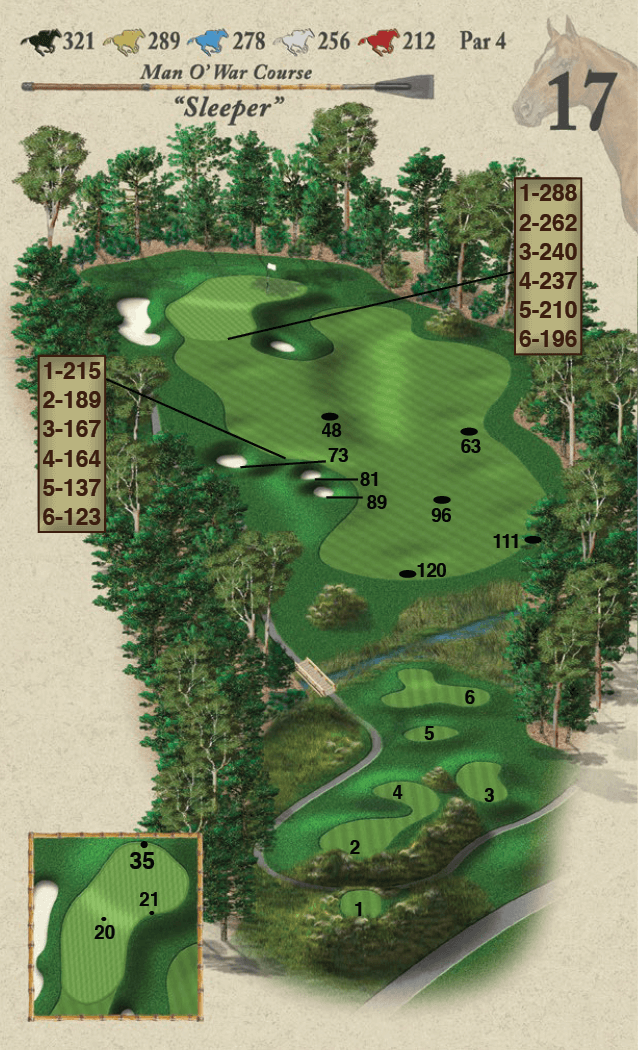
Hole 17 – “Sleeper”
A drivable par four but the best play is iron off the tee to the right side of the fairway. Pick your approach yardage carefully as the green complex is rather difficult. The pin positions are shorter left than right. Definite birdie possibility.
Hole 18 – “Home Stretch”
Careful of the hazard on the right off the tee. A well struck drive will leave you with a mid iron into a two tiered green with the lower portion on the left. The pins on the right and dangerous and the green is usually quite firm on that side. Here again long is wrong!!
